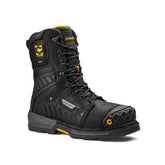
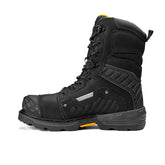
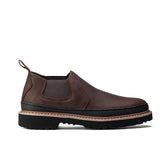
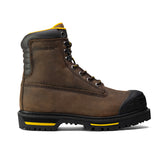
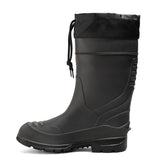
How to Break in Work Boots
You just got a new pair of work boots—rugged, durable, and built to handle the toughest job sites. But before they become your go-to gear, you’ve got one hurdle: breaking them in.
Stiff leather, tight spots, and sore feet can make those first few days rough. The good news? With the right techniques, you can break in your boots quickly and comfortably—without the blisters.
Whether you're on a construction site, in a warehouse, or tackling heavy-duty projects outdoors, proper break-in methods ensure your boots mold to your feet while maintaining their durability. Let’s dive into the best ways to soften up your new work boots and make them job-ready in no time.
Why Are New Work Boots So Stiff?
Work boots are built tough—designed with premium materials like full-grain leather, thick rubber outsoles, and reinforced toe caps to withstand harsh conditions. That same durability, however, means they start off rigid.
-
Leather fibers need time to flex and loosen before conforming to your foot’s shape. The tighter the grain, the longer it takes to soften.
-
Thick soles and heavy-duty construction require gradual movement to become more forgiving. Steel or composite toe caps can also add to the initial stiffness.
-
Synthetic and waterproof materials may take longer to break in but can be softened with heat and moisture techniques.
How to Break in Work Boots (step-by-step)
Skipping the break-in process can lead to blisters, hotspots, and unnecessary wear on your boots. Instead, follow these expert-approved strategies to speed things up.
Step 1: Pre-Wear Preparation
Before you even put your boots on, take these steps to start the softening process:
Condition the Leather
Apply a quality leather conditioner to soften the material and improve flexibility. Look for products designed for work boots to maintain durability. Use a soft cloth to apply the conditioner evenly, then let it sit overnight before wiping off any excess.
Flex the Boots by Hand
Hold the heel and toe, then gently bend the sole back and forth to loosen up stiffness. Repeat this motion 10-15 times before wearing them. This is especially useful for boots with thick midsoles.
Use a Boot Stretcher
If you feel pressure points, a boot stretcher can help expand tight areas for a better fit. Insert the stretcher and leave it overnight, gradually increasing pressure until the leather relaxes.
Wear Thick Socks Indoors
Slip on your boots indoors with thick socks for short periods to start molding them to your feet. Wool socks work best as they provide cushioning while helping to stretch the leather.
Step 2: Gradual Wear Method
Easing into full-time wear prevents painful blisters and allows your boots to adjust naturally.
Day 1-2: Wear your boots for 1-2 hours while walking or standing.
Day 3-5: Increase wear time to 3-4 hours, preferably on soft terrain like carpet or grass.
Day 6-7: Wear them for a full work shift but bring a backup pair in case of discomfort.
Beyond Week 1: Your boots should now feel much more comfortable, but continue adjusting as needed.
This method allows your feet and the boot materials to adapt without causing strain or injury.
Step 3: Moisture & Heat Techniques
For faster results, controlled use of moisture and heat can help soften stiff materials:
Steam Method
Hold your boots over steam (from a kettle or steam gun) for about 30 seconds, then put them on immediately to shape them to your feet. The warmth helps relax the fibers without damaging the structure.
Warm Water Soak (For Leather Only)
Lightly dampen the inside with warm water, wear thick socks, and walk around until dry. This method speeds up the molding process. Be careful not to over-saturate, as excess moisture can weaken adhesives.
Hairdryer Trick
Apply moderate heat to tight areas while flexing the leather, then wear the boots to let them form around your feet. Keep the hairdryer at least 6 inches away to prevent damage.
Caution: Avoid excessive heat (like ovens or direct sunlight) as it can dry out and crack the leather.
Step 4: Do’s and Don’ts
Do This:
✔ Use boot insoles for extra comfort and support.
✔ Rotate between two pairs of boots if possible.
✔ Keep your feet dry to prevent blisters.
Avoid This:
✘ Don’t soak boots in water for long periods—it weakens the structure.
✘ Don’t use extreme heat (ovens, radiators, etc.)—it can ruin leather.
✘ Don’t rush the process by forcing all-day wear too soon.
Keep Your Boots Comfortable for Years
Once broken in, proper care ensures lasting comfort:
- Regular Conditioning – Keep leather soft and crack-free by applying conditioner every few months.
- Clean After Use – Remove dirt and debris to prevent stiffening, especially if you work in wet or muddy conditions.
- Replace Insoles When Needed – Fresh insoles can make old boots feel new again. If you work long hours on hard surfaces, consider gel or memory foam insoles for added comfort.
Breaking in your work boots doesn’t have to be a painful process. Follow these steps, and soon your new boots will feel like a second skin—ready to take on the toughest jobs.
Got a break-in trick that works for you? Share your experience in the comments below!

